
Review · HONOLULU
Hawaii: Electric Hydrofoil Surfing Solo Lesson
The clever part of this 90-minute Hawaii eFoil lesson is the slow build from balance board to powered hydrofoil. You first learn how to control your weight on land, then repeat those movements on the water in stages: belly down, on your knees, and finally standing. Most students reach knee riding and standing during their first session.
I like the balance-board simulator, which gives you a useful rehearsal before you handle a real board and motor. I also like the radio helmet, since you can keep hearing your instructor while the board moves away from the beach. The main drawback is the price: at $299, this is a serious splurge for 90 minutes, even though one hour is spent on the water.
Key points for your eFoil lesson
- Three riding positions: Learn belly riding, knee riding, and standing in a clear step-by-step order.
- Land practice first: Use an eFoil simulator to work on balance, center of gravity, and turning.
- 60 minutes on the water: The remaining 30 minutes cover the land lesson, equipment, and safety instruction.
- Radio helmet included: Keep in contact with the instructor during water practice.
- No surf background needed: Board-sport balance can help, but beginners are welcome.
- Weight and age rules matter: The standard limit is 200 pounds, with a $49 option for 201 to 265 pounds. The minimum age is 10.
What eFoiling feels like at the start
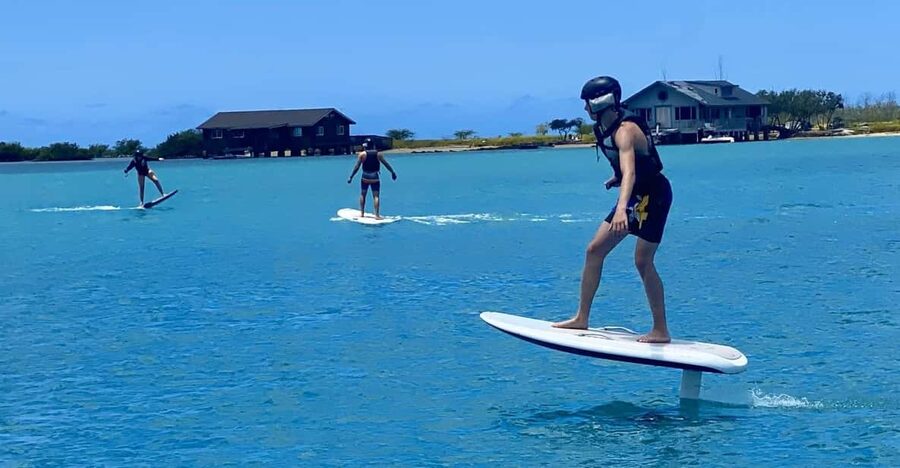
An eFoil is an electric-powered board with an underwater foil that lifts the board above the surface once you gain enough speed. That sounds technical, but the lesson reduces it to a simple job: control your weight, listen to the instructor, and make small changes instead of sudden ones.
You do not need to arrive as a surfer. You do need to feel comfortable in the water while wearing a life jacket. If you have used a skateboard, wakeboard, snowboard, paddleboard, or similar equipment, your balance may help you move from crawling to kneeling and standing faster. Still, the lesson is built for first-timers.
I would not think of this as a normal surf class. Traditional surfing depends on waves, timing, and paddling. This activity uses a powered board and a motor-controlled remote, so you can take your time getting upright rather than waiting for the right wave.
That slower rhythm is useful. You are learning several new things at once: how the remote works, how the board responds to speed, how to shift your weight, and how to fall away safely. A staged lesson keeps those tasks from arriving all at once.
More eFoil and Hydrofoil Surfing in the USA:
- E-Foil Surfing for Beginners in Fort Lauderdale Beach
★ 5.0 · 2 reviews - Efoil Surf Board Lesson in Calheta Beach
★ 5.0 · 12 reviews - Santorini Wing Foil Surf Lesson for Beginners
★ 5.0 · 6 reviews
The land lesson and balance-board simulator
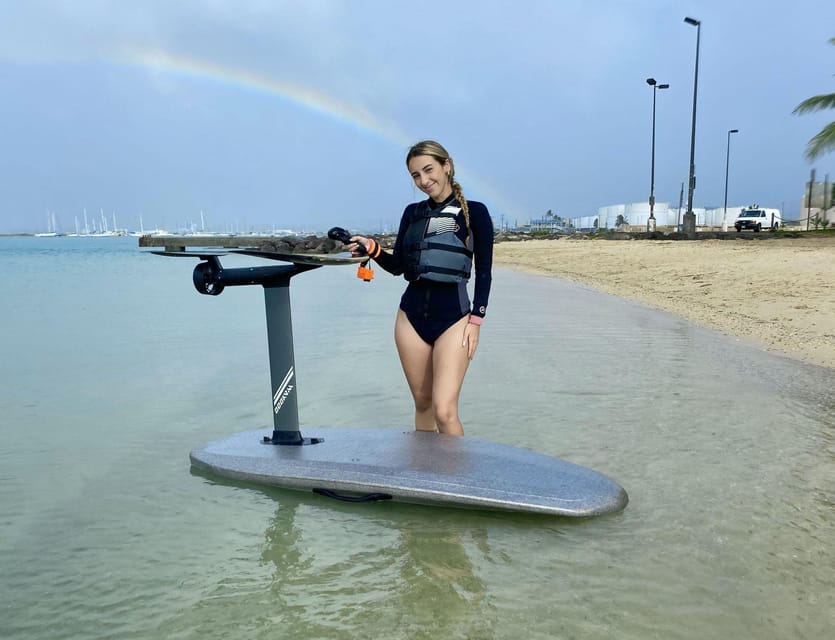
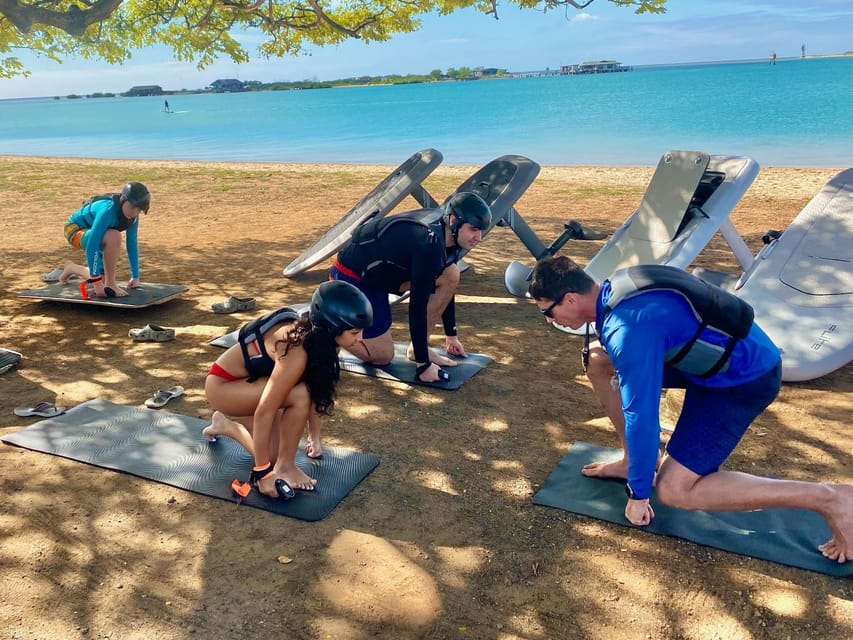
The session begins on land with a safety and control lesson. You get fitted with a life jacket and whistle, then work with the balance-board eFoil simulator. This part is not filler. It gives you a chance to feel how small shifts in your center of gravity affect the board.
You practice the three positions used later on the water:
- Belly down, which lets you get familiar with the board and remote.
- Kneeling, which introduces turning and more control over your weight.
- Standing, which is the position used for full eFoiling.
The simulator also helps you learn how to maneuver in both directions. That matters because many new riders have a preferred side and feel awkward turning the other way. Practicing both directions before you leave the beach gives you a basic movement plan instead of asking you to improvise.
The instructor also explains the Bluetooth remote. You learn how to control the board and how to stop in an emergency. The exact remote controls may feel unfamiliar at first, so pay close attention during this section. The lesson is not only about getting upright. It is also about knowing how to slow down and separate yourself from the board if something goes wrong.
You will be shown how to fall away from the board safely. This is one of the most useful parts of the briefing. A board with a motor and foil is equipment you need to give space, so do not try to grab it during a fall.
Why the radio helmet helps on the water
A radio helmet lets you hear your instructor while you are riding. That is especially helpful once you are moving across the water and cannot easily turn around to check where the instructor is.
For a first lesson, constant communication can make the session less confusing. You can receive short instructions about speed, posture, turning, and stopping without having to paddle back for every correction. The instructor can also guide the next step as you become ready.
This does not remove the need for concentration. You still need to watch your balance and respond to the board. Think of the helmet as a direct coaching line, not an automatic safety system. You remain responsible for following instructions and giving yourself room to fall.
The equipment package includes the eFoil board and related gear, the life jacket, whistle, radio helmet, and remote. You only need to bring swimwear, sunscreen, and a hat. Food and drinks are not included, and transportation to and from the activity is also your responsibility.
The first water stage: belly rides and emergency stops
The water session begins at the easiest riding level, belly down. This position puts you close to the board and keeps the early focus on control rather than standing balance.
You practice using the remote, moving the board, and turning. You also work on emergency stops. I like this order because it gives you a basic answer to the most important question: how do I stop? It is better to learn that while lying down than after you are already upright and moving quickly.
Belly riding also lets you get used to the board’s response. The motor provides movement, but the board still reacts to your body position. Small shifts can change your direction, so resist the urge to make large movements.
This part may feel less exciting than standing, but it sets up the rest of the lesson. If you rush through it, kneeling and standing will feel harder. If you understand the remote and can stop cleanly, you can spend more of the session working on balance.
More Surf Lessons around the USA:
- Maui: Two Hour Beginner Group Surf Lesson in Kihei
★ 5.0 · 950 reviews - UTV Dune Cruise and Surf at Coral Pink Sand Dunes
★ 5.0 · 785 reviews - Open Group Surfing Lesson in Waikiki, Hawaii
★ 4.5 · 582 reviews - Outrageous Surf ScHool Lesson on Lahaina Side
★ 4.5 · 547 reviews
Kneeling turns and the first lift
Once you are comfortable belly riding, you move to your knees. The instructor helps you practice turns in both directions and gradually increase speed to the point needed for eFoiling.
Knee riding is an important middle step. You are higher above the board, so your center of gravity changes, but you still have more stability than when standing. It is also a good place to learn how much pressure to put through your hands, knees, and feet.
The next move is a slow pop-up to standing. Unlike a wave-based surf lesson, you do not need to hurry because a wave is arriving behind you. You can take time to find your stance and rise when you feel ready.
Your proper stance may not feel obvious on the first attempt. One foot will naturally want to lead, and your balance may be better in one direction than the other. The instructor can help you test both options and make small adjustments.
Expect some wobbling. The goal is not to look graceful right away. The goal is to stay relaxed enough to make controlled corrections. Tightening your whole body can make balance harder, while small, calm movements give the board a chance to settle.
Standing eFoil practice and touch-and-go runs
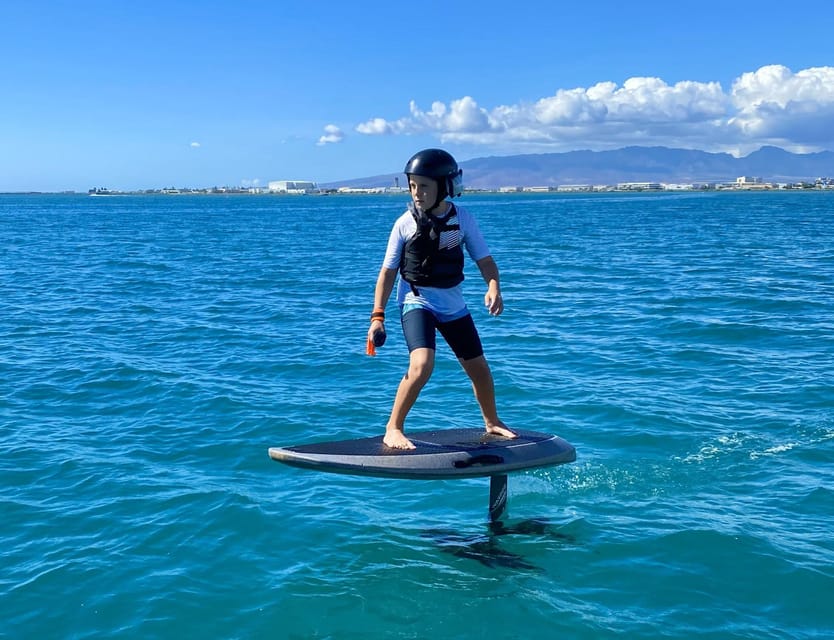
After the slow pop-up, you work on standing while keeping the board stable. The lesson uses a touch-and-go approach, meaning you may rise briefly, lose the lift, settle back onto the water, and try again.
This is a smart way to learn. You are not expected to hold a perfect flight for a long stretch on your first attempt. Instead, you learn the feeling of the board beginning to rise, then practice repeating that movement.
To lift the board, you slowly shift your center of gravity back. The foil responds by raising the board above the water. The key word is slowly. A sudden shift can send the board too high or make you lose control.
Once you find the lift, the instructor helps you practice going in both directions. Turning one way may feel natural while the other feels clumsy. Do not treat the weaker side as a failure. It is simply part of learning how your stance and body position work together.
The stated progression is encouraging: all clients have successfully reached knee surfing and standing during a first lesson, and most students are confidently eFoiling after 30 to 60 minutes of instruction. That does not mean every person will cruise continuously for an hour. It means the teaching sequence is designed to get you upright and moving within the available water time.
How the 90 minutes are divided
The total activity lasts 90 minutes, with 60 minutes on the water. The remaining time covers the land lesson, equipment fitting, remote instruction, and safety practice.
That split is worth understanding before you book. If you expect 90 minutes of riding, the experience will feel shorter than expected. If you see the land time as part of learning to control a powered hydrofoil, the schedule makes more sense.
The water time is long enough for a real progression from belly riding to standing attempts. Your pace will depend on balance, comfort in the water, and how quickly you understand the remote. The instructor gives you time to practice instead of treating the session as a quick demonstration.
The experience is described as a private group. That means it is not necessarily a one-person lesson in the everyday sense, so confirm the exact group arrangement when booking if personal attention is your main concern. The teaching plan is still structured around individual progress, with the instructor guiding each stage.
The $299 price and who gets good value
At $299 per person, this is not a budget water activity. The cost includes the instructor, all eFoiling equipment, the simulator lesson, safety gear, radio helmet, and 60 minutes of water time.
I think the price makes the most sense if you specifically want to learn eFoiling rather than simply try a short ride. You are paying for equipment that would be costly and difficult to arrange on your own, plus instruction that covers controls, falls, stops, turns, and body position.
The value is also better for someone who wants a proper introduction. A short, unguided rental might seem cheaper, but it would not provide the same step-by-step coaching or immediate help with the remote and foil lift.
Still, the price may be hard to justify if you only want a quick thrill or are unsure about board sports. You may spend part of the hour learning basic control, especially if balance is new to you. This is a lesson first and an adrenaline activity second.
Participants weighing 201 to 265 pounds can book an additional option for $49. The standard lesson limit is 200 pounds, so check this detail before paying. The minimum age is 10.
Who should book this Hawaii experience
I would recommend this lesson to you if you are curious about eFoiling but do not own the equipment or know where to begin. It also suits people who like active instruction and want to learn a new board skill during a Hawaii visit.
You do not need surfing experience. You should be comfortable in the water with a life jacket, and you should be ready to listen closely to safety instructions.
A background in board sports may help you progress faster from eSurfing to eFoiling, but it is not required. The simulator and three-position method give beginners a starting point.
I would not book this if you are pregnant, have back problems, or have a mobility impairment. The activity requires balancing, kneeling, standing, falling safely, and handling a moving board. The supplied restrictions are important, not minor fine print.
Bring swimwear, sunscreen, and a hat. Since food and drinks are not included, plan those separately. Transportation is also not provided, so arrange your own way to the activity location in Waikiki.
Booking flexibility and practical planning
You can cancel up to 24 hours before the activity for a full refund. There is also a reserve-now, pay-later option, which helps if your Hawaii plans are still changing.
The lesson is taught in English. Starting times vary, so check availability for the date you want. If you are booking for a child, a larger participant, or someone with limited board-sport experience, confirm the age, weight, and suitability rules before finalizing the reservation.
Weather, water conditions, and scheduling details are not specified here, so do not assume the exact timing or launch arrangement until you receive your booking information. Plan to arrive ready in swimwear with sunscreen already available.
Should you book the eFoil Waikiki lesson?
Book it if you want a real introduction to electric hydrofoiling and value instruction more than a cheap water ride. The balance-board practice, radio helmet, safety training, and gradual move from belly riding to standing give you a clear way into a tricky sport.
Think twice if $299 feels high for an activity where part of the session is spent learning basic control. You also need to be comfortable in the water and physically able to kneel, stand, balance, and fall away from the board.
For the right person, this is a focused Hawaii activity with a satisfying goal: start on land, learn the remote, control the board on your belly, and work toward lifting above the water on your own. If that progression sounds more appealing than simply floating around for an hour, this lesson is worth considering.
FAQ
How long does the eFoil lesson last?
The activity lasts 90 minutes. This includes a land lesson and 60 minutes of practice on the water.
Do I need surfing experience?
No. Prior surfing experience is not required, although experience with board sports and balance may help you progress more quickly.
What safety equipment is included?
You receive a life jacket, whistle, and radio helmet. The instructor also teaches you how to fall away from the board and how to make emergency stops.
What age do I need to be?
Participants must be at least 10 years old.
Is there a weight limit?
The standard lesson is for participants up to 200 pounds. An additional option is available for people weighing 201 to 265 pounds at an extra cost of $49.
What should I bring?
Bring a hat, swimwear, and sunscreen. Transportation, food, and drinks are not included.
Latest surf sessions around the USA
- Waikiki: Family, Private, and Group Surfing Lessons★ 5.0 · 4 reviews
- Waikiki: Surf Lessons Easy 60 min classes no crowds!★ 4.9 · 21 reviews
- Astonishing Scavenger Hunt: Surf, Sand and Sculptures!★ 3.0 · 2 reviews
- Two- Hour Group Surfing Lesson in Cocoa Wrightsville Beach, NC★ 5.0 · 13 reviews
- Electric Bike Rentals in Topsail Island and Surf City★ 5.0 · 2 reviews
- Surf Lesson in Santa Barbara★ 3.0 · 2 reviews
- 1-on-1 Private Surf Lesson in Santa Barbara★ 5.0 · 4 reviews
- Surf lesson with KTO Yoga Surf★ 4.0 · 5 reviews
Honolulu Surf Lessons, compared.
Kayak, Snorkel, and Surf with Turtles in Honolulu
Read our review →
Oahu: Waikiki Beginner Private Surf Lesson- Female Guide
Read our review →
Waikiki: Surf Lessons Easy 60 min classes no crowds!
Read our review →
Waikiki: Family, Private, and Group Surfing Lessons
Read our review →Browse the lists this tour appears in